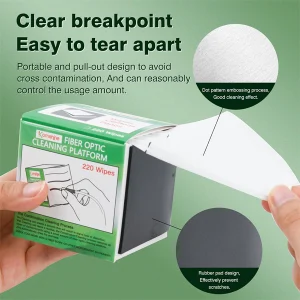
A lint-free wipe is one of the most common tools for cleaning fiber optic connectors, but using it correctly takes more care than simply wiping the ferrule. If you are asking how a fiber connector should be cleaned if using a lint-free wipe, this guide covers the exact technique — the dry and wet-to-dry methods, the straight-pull motion, and the mistakes that turn a cleaning wipe into a source of contamination.
Why the Technique Matters So Much
The core of a single-mode fiber is only about 9 microns across — smaller than a speck of dust. A contaminant sitting on that core blocks the light path, raises insertion loss, and creates back reflection. A lint-free wipe removes contamination effectively, but only when used with the right motion; a careless wipe can redeposit debris, leave a static charge, or drag particles across the glass and scratch it. The wipe is the tool, but the method is what actually cleans.
Dry vs Wet-to-Dry With a Lint-Free Wipe
A lint-free wipe supports two cleaning approaches, and knowing when to use each is the first step.
Dry Cleaning
For light contamination such as dust and lint, draw the connector ferrule across a fresh, dry section of the wipe in one straight motion. Dry cleaning is quick, but a purely dry wipe can leave a static charge on the end face that immediately attracts new particulate.
Wet-to-Dry Cleaning (Preferred for Most Situations)
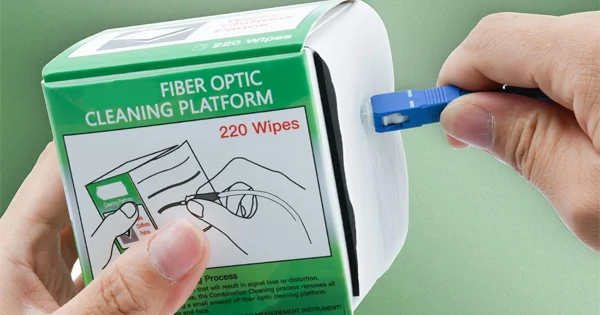
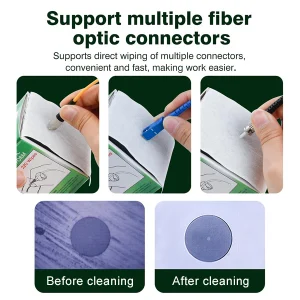
For oils, fingerprints, or stubborn residue — and to avoid the static problem — use the wet-to-dry method. Apply a small amount of fiber-grade cleaning fluid or high-purity (≥99%) isopropyl alcohol to one area of the wipe, then draw the ferrule from the wet area straight across to a dry area, finishing on the dry section. This dissolves contamination and clears the static charge in a single pass.
How to Clean a Connector With a Lint-Free Wipe: Step by Step
Step 1: Inspect First
Follow the inspect–clean–inspect method. Inspect the end face with a fiber scope or probe. Clean with the wipe only if contamination is present, so you do not add static and dust to an already-clean connector.
Step 2: Apply Fluid to the Wipe (for Wet-to-Dry)
Place a small drop of fiber-grade fluid on one area of the wipe. Apply fluid to the wipe — never flood the connector or drip fluid directly onto the ferrule, because excess liquid wicks contamination into the connector body.
Step 3: Draw the Ferrule in One Straight Motion
Hold the ferrule against the wet area and pull it in a single straight line across to the dry area. Do not scrub in circles or back and forth — a circular motion redeposits the very debris you are trying to remove and can grind particles into the glass.
Step 4: Use a Fresh Section Every Time
Advance to a clean, unused part of the wipe for every pass. A used section is already contaminated and will transfer particles straight back onto the end face. Never reuse a wipe area.
Step 5: Re-Inspect Before Mating
Inspect the end face again. A clean connector shows a clear, defect-free core and cladding. If contamination remains, repeat with a fresh section, then mate or recap immediately.
The Right Way vs the Wrong Way
| Do | Don’t |
| Pull the ferrule in one straight motion | Scrub in circles or back and forth |
| Use wet-to-dry, finishing on a dry area | Leave the end face wet with fluid |
| Apply fluid to the wipe | Drip or flood fluid onto the connector |
| Advance to a fresh section each pass | Reuse the same area of the wipe |
| Use ≥99% IPA or fiber-grade fluid | Use household alcohol, tissues, or cloth |
Why a Lint-Free Wipe Specifically
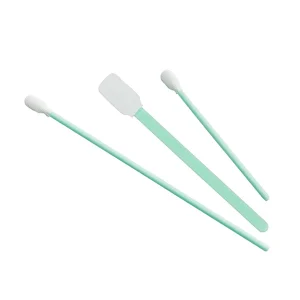
The word “lint-free” is not marketing — it is the whole point. Ordinary tissues, paper towels, cotton swabs, and cloth all shed tiny fibers, and on a 9-micron core a stray thread is just as damaging as a dust particle. A true optical-grade lint-free wipe is manufactured from non-woven material that does not release fibers as the ferrule is drawn across it, so it removes contamination without leaving its own behind. This is why substituting a household material almost always makes things worse: you trade the original dust for lint, and often add oils or a residue from whatever the material was treated with. When the goal is a defect-free end face measured in microns, the cleaning surface itself has to be engineered for the job, and that is exactly what a lint-free optical wipe is.
Which Connectors Suit a Wipe
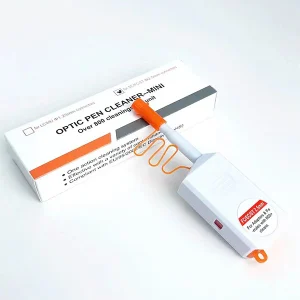
A lint-free wipe works best on exposed patch-cord ferrules that you can draw across the wipe surface — SC, LC, FC, and ST connectors. For connectors seated inside adapters, bulkheads, or transceiver ports, a wipe cannot reach the recessed ferrule; a one-click (push-type) cleaner or a connector swab is the right tool there. Choosing the wipe for exposed ferrules and a push cleaner for in-adapter connectors covers most situations.
Getting Consistent Results
Beyond the core technique, a few habits make lint-free wipe cleaning reliable every time. Work over a clean surface so the wipe and connector are not exposed to fresh dust while you handle them. Open sealed wipes only when you need them, and reseal or discard the packet so the remaining wipes stay clean. Keep your cleaning fluid capped and use only a small amount — a damp area, never a soaked one — so it evaporates quickly and leaves no residue. Cap the connector immediately after it passes inspection to protect the freshly cleaned end face until it is mated. And when you are cleaning many connectors in a session, establish a rhythm of inspect, clean with a fresh section, re-inspect, cap, because consistency is what keeps every connection to the same standard rather than leaving some clean and others marginal.
Common Lint-Free Wipe Mistakes
- Circular scrubbing: redeposits debris and can scratch the glass. Always pull straight.
- Reusing a wipe section: a used area is dirty and re-contaminates the ferrule.
- Skipping the dry finish: a purely wet wipe leaves residue; a purely dry wipe leaves static. Wet-to-dry solves both.
- Flooding with fluid: excess liquid wicks contamination into the connector.
- Using non-optical materials: tissues, paper towels, and cloth shed lint and leave residue.
Get the Right Cleaning Consumables
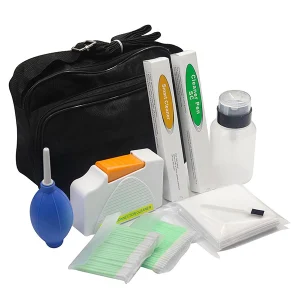
Reliable cleaning depends on true lint-free, optical-grade wipes and fluid rather than improvised materials. Aevumix supplies lint-free optical wipes, fiber-grade cleaning fluids, one-click cleaners, cassette cleaners, and swabs for every connector type. If you would like help choosing the right cleaning consumables for your connectors, contact our team.
FAQs
How Should a Fiber Connector Be Cleaned With a Lint-Free Wipe?
Inspect first, then use the wet-to-dry method: apply a small amount of fiber-grade fluid to the wipe, draw the ferrule in one straight motion from the wet area to a dry area, use a fresh section each time, and re-inspect before mating.
Should I Clean in a Circular Motion?
No. Always pull the ferrule in a single straight line across the wipe. A circular or back-and-forth motion redeposits debris and can grind particles into the glass, scratching the end face.
Dry or Wet-to-Dry — Which Is Better?
Wet-to-dry is preferred for most situations because it removes oils and residue and clears the static charge that a dry-only wipe leaves. Use dry cleaning only for very light dust, and finish on a dry area either way.
Can I Reuse a Lint-Free Wipe?
No. Always advance to a fresh, unused section for each pass. A used area is already contaminated and will transfer particles straight back onto the connector end face.
What Fluid Should I Use on the Wipe?
Use a dedicated fiber-grade cleaning fluid or high-purity (≥99%) isopropyl alcohol. Avoid household or denatured alcohol, which leaves a film, and never use tissues or cloth, which shed lint.