Cutting optical fiber cable is not like cutting copper wire — you cannot simply snip it with cutters. Preparing fiber for splicing or termination means stripping, cleaning, and cleaving in a precise sequence. This guide explains how to cut optical fiber cable the right way, the tools you need, and the mistakes that ruin an otherwise good job.
Important first point: “cutting” fiber really means cleaving it — a controlled break that creates a flat end face. Ordinary scissors or cutters would shatter the glass and make it useless.
Why Fiber Can’t Be Cut Like Copper
An optical fiber is a hair-thin strand of glass. If you shear through it with cutters or scissors, the end face deforms and cracks, causing severe signal loss and reflection at any joint. Instead, fiber is cleaved: the surface is scored to create a tiny crack, then tension is applied so the glass breaks cleanly along that line, leaving a smooth, flat, perpendicular end face. Getting this right is the foundation of every low-loss splice and termination.
Tools You Need
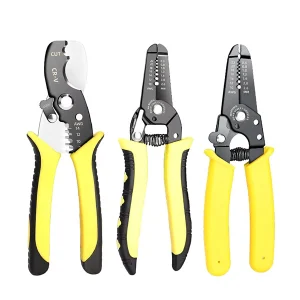
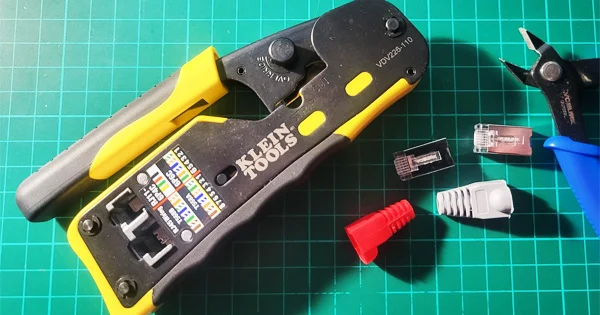
- Cable stripper / jacket stripper: to remove the outer cable jacket.
- Kevlar (aramid) cutter: to cut the strength members, which ordinary cutters cannot handle well.
- Fiber stripper: to remove the buffer and coating down to the bare glass.
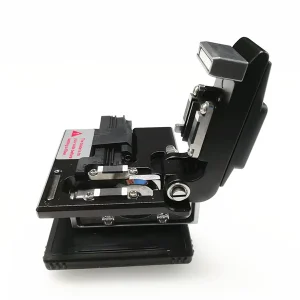
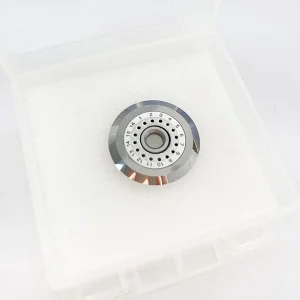
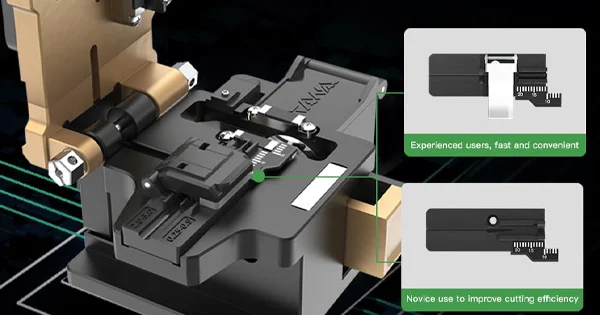
- Fiber cleaver: to make the actual cleave (the “cut”).
- Lint-free wipes and fiber-grade fluid: to clean the bare fiber before cleaving.
- Safety glasses and a scrap container: fiber shards are sharp and hazardous.
How to Cut (Cleave) Optical Fiber: Step by Step
Step 1: Strip the Cable Jacket
Use a cable stripper to remove the outer jacket, exposing the strength members and the coated fiber inside. Peel back an appropriate length — typically a set working length for your splice enclosure or connector. Cut away the Kevlar strength members with an aramid cutter.
Step 2: Strip the Coating to Bare Glass
With a fiber stripper, remove the buffer and acrylate coating to expose the bare 125-micron glass. Pull in a smooth, straight motion and take care not to nick the glass, which would weaken it. Avoid thermal shock and rough handling during this step.
Step 3: Clean the Bare Fiber
Wipe the bare fiber once with a lint-free wipe lightly dampened with fiber-grade fluid or high-purity isopropyl alcohol, then wipe dry. This removes coating residue and debris. Clean before cleaving, never after — the freshly cleaved end face is pristine and wiping it only contaminates it. Do not touch the cleaned fiber afterward.
Step 4: Cleave the Fiber
Place the stripped, cleaned fiber into the cleaver’s V-groove, close the holder and cover, and operate the cleaver (many are one action). The blade scores the surface and tension breaks the glass, producing a flat end face. Typical steps: open the cover, place the fiber on the V-groove, close the holder cover, close the cover and move the slider to cleave, then open and remove the fiber.
Step 5: Handle the Offcut and Fiber Safely
Use tweezers to remove the small glass offcut and place it in a dedicated sharps container — never let shards fall loose, as they easily embed in skin. Do not touch the cleaved end face; proceed straight to splicing or connectorizing.
The Cleaving Sequence at a Glance
| Step | Tool | Result |
| Strip jacket | Cable stripper, Kevlar cutter | Coated fiber exposed |
| Strip coating | Fiber stripper | Bare 125µm glass |
| Clean | Lint-free wipe + fluid | Residue-free bare fiber |
| Cleave | Fiber cleaver | Flat, perpendicular end face |
Common Mistakes to Avoid
- Trying to cut with scissors or cutters: shatters the glass; always cleave.
- Nicking the fiber when stripping: weakens the glass and causes breaks. Use a proper fiber stripper and a smooth motion.
- Cleaning after cleaving: contaminates a perfect end face. Always clean before.
- Touching the bare or cleaved fiber: skin oil ruins the end face.
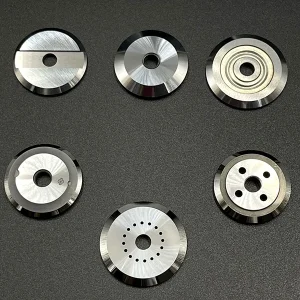
- A poorly maintained cleaver: a dull or dirty blade produces angled, chipped cleaves and high splice loss.
- Skipping safety gear: fiber shards are dangerous to eyes and skin.
Stripping Without Damaging the Fiber
The stripping step deserves special care because it is where fragile fiber is most easily damaged. The bare glass is only 125 microns across, and a nick from a misused stripper creates a stress point that can cause the fiber to break during handling or fail later under tension. Use a stripper sized correctly for the coating you are removing, hold the fiber steady, and pull in one smooth, straight motion rather than sawing or twisting. Remove the coating in manageable lengths rather than a very long section at once, and avoid touching the freshly bared glass. If you feel the stripper dragging or see coating residue clinging to the fiber, clean it away before cleaving rather than forcing the tool. Careful stripping sets up a clean cleave; rushed or rough stripping is a frequent hidden cause of weak splices and mysterious later breaks.
Why a Good Cleave Matters
The cleave is the single most important preparation step. Much of the variation in splice loss comes down to cleave quality — an angled or chipped end face defeats the splicer’s alignment and can cause bubbles at the joint that force the splice to be remade. Single-mode fiber, with its tiny core, is especially unforgiving. Investing time in a clean strip, a proper clean, and a quality cleaver pays off in strong, low-loss connections.
Preparing Different Cable Types
The exact preparation varies a little with the cable you are cutting. A simple indoor patch or drop cable has a thin jacket and a single coated fiber, so stripping is quick. A loose-tube outdoor cable has a tougher jacket, water-blocking materials, and gel or dry-blocking around the fibers that must be cleaned away before stripping the individual fibers. Tight-buffered distribution cable places a 900-micron buffer over each fiber, which is removed in stages down to the 250-micron coating and then the bare glass. Armored cables add a metal layer that needs the correct opening technique and care to avoid injury. Whatever the construction, the core sequence stays the same — access the fiber, strip to bare glass, clean, and cleave — but knowing your cable type tells you which extra layers and materials you will meet along the way, so you bring the right stripping and opening tools and are not caught out mid-job.
Get the Right Fiber Preparation Tools
Clean cuts start with purpose-built tools. Aevumix supplies fiber cleavers, fiber and cable strippers, Kevlar cutters, cleaning consumables, and inspection tools for preparing fiber correctly. If you would like help choosing the right tools for cutting and preparing your fiber, contact our team.
FAQs
How Do You Cut Optical Fiber Cable?
You cleave it, not cut it. Strip the jacket and coating to bare glass, clean the bare fiber, then use a fiber cleaver to score and break it into a flat, perpendicular end face ready for splicing or termination.
Can I Cut Fiber With Scissors or Wire Cutters?
No. Shearing through the glass deforms and shatters the end face, causing high loss. Fiber must be cleaved with a proper fiber cleaver, which produces a smooth, flat surface.
Should I Clean the Fiber Before or After Cutting?
Clean the bare fiber before cleaving to remove coating residue. Never clean after cleaving — the freshly cleaved end face is already pristine, and wiping it only introduces contamination.
What Tools Do I Need to Cut Fiber?
A cable stripper, a Kevlar cutter, a fiber stripper, a fiber cleaver, lint-free wipes with fiber-grade fluid, and safety glasses with a scrap container. The cleaver does the actual “cut.”
Why Is the Cleave So Important?
Because cleave quality strongly affects splice loss. A poor, angled, or chipped cleave defeats alignment and can cause bubbles at the joint, forcing the splice to be remade. A clean, flat cleave is the basis of a low-loss connection.