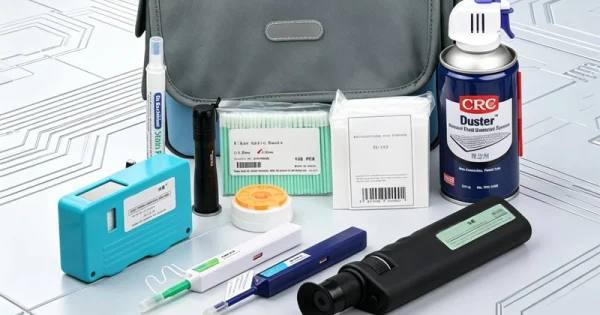
Fiber optic connectors are precision components, and the tools used to keep them clean are just as specialized. Knowing how to use fiber optic cleaning tools correctly is what separates a reliable, low-loss network from one plagued by intermittent faults. This guide walks through the main tool types — one-click cleaners, cassette cleaners, swabs, and lint-free wipes — and the exact technique for each.
Everything here follows the workflow used by professional field installers and data-center teams, anchored by the golden rule of fiber cleaning: inspect, clean, inspect.
Why Technique Matters as Much as the Tool
The core of a single-mode fiber is only about 9 microns across — smaller than a speck of dust. A contaminant sitting on that core blocks the light path, raises insertion loss, and creates back reflection. Worse, mating a dirty connector to a clean one contaminates both end faces and can permanently scratch the glass.
Using a purpose-built tool with the wrong technique can be as damaging as using no tool at all. Twisting a one-click cleaner at an angle, reusing a swab, or flooding a connector with fluid all reintroduce contamination. The tool gives you the mechanical or chemical action; correct technique makes it effective.
The Golden Rule: Inspect, Clean, Inspect
Before touching any cleaning tool, understand the sequence every professional follows. First, inspect the end face with a fiber scope or digital probe. Clean only if contamination is present. Then re-inspect before mating. Cleaning blindly is risky — cleaning an already-clean connector can generate static that attracts new dust or push particles into the contact zone. Inspection tells you whether cleaning is needed and whether it worked.
How to Use a One-Click (Push-Type) Cleaner
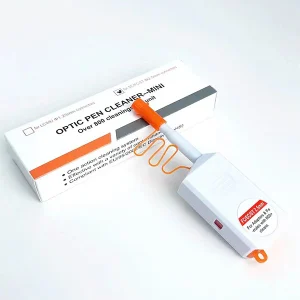
One-click cleaners are the go-to tool for connectors seated in adapters, bulkheads, and transceiver ports, as well as for exposed patch-cord ferrules. They are dry, alcohol-free, anti-static, and typically deliver several hundred cleanings per unit.
For Connectors Inside an Adapter or Port
Insert the cleaner tip straight into the adapter or bulkhead — never at an angle. Push the body forward with light, even pressure until you hear an audible “click.” That click means a fresh section of cleaning tape has swept across the ferrule end face. Withdraw the tool. One controlled push is usually enough.
For Exposed Patch-Cord Connectors
Insert the connector ferrule into the cleaner’s guide cap, then push until you hear the click. Choose the correct tip size for your ferrule: 2.5 mm for SC, FC, and ST connectors, or 1.25 mm for LC. For MPO/MTP, use a dedicated MPO cleaner that cleans all fibers in the array at once.
Key tips: keep the tool square to the connector, apply light pressure, never force it, and never touch the cleaning tip with your fingers.
How to Use a Cassette (Reel) Cleaner
A cassette cleaner holds a length of lint-free cleaning tape behind a shutter. It is ideal for cleaning exposed ferrules and for tackling stubborn contamination that a one-click pen cannot lift. It is not designed for cleaning connectors inside bulkheads.
Open the shutter to expose a fresh strip of tape. For dry cleaning, hold the connector ferrule against the tape and draw it across in one straight motion. For heavier or oily contamination, use the wet-to-dry method: apply a small amount of approved fiber-grade cleaning fluid to one area of the tape, draw the ferrule from the wet area to a dry area, and finish dry. Most cassettes advance a fresh tape segment with each swipe, so you never reuse a dirty surface. Never use ordinary isopropyl alcohol on the tape unless it is a fiber-approved grade.
How to Use Swabs and Lint-Free Wipes
Swabs and wipes handle the situations the self-contained tools cannot reach.
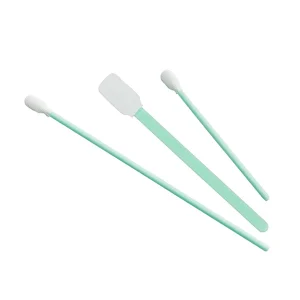
- Swabs: use a connector-specific swab sized for the port you are cleaning — ideal for recessed interfaces and mating sleeves. Dampen it lightly with fiber-grade fluid (damp, never dripping), clean the recessed ferrule, and never reuse a swab. A wet swab should never be inserted into a live transceiver port.
- Lint-free wipes: use for exposed ferrules and for the wet-to-dry method. Place a small drop of fluid on the wipe, draw the ferrule from the wet zone straight across to the dry zone, and advance to a fresh section for every pass.
Matching Tools to Connector Types
The workflow stays the same across connectors, but the tool and tip change with the form factor:
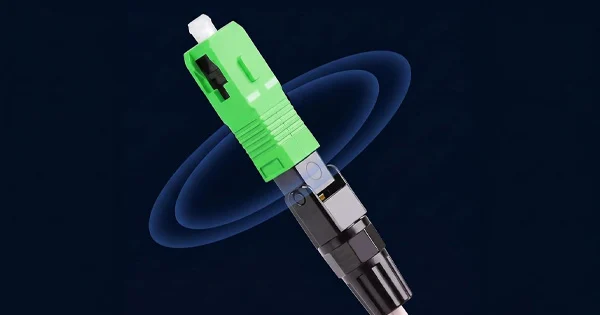
- SC connectors: a square, push-pull design common in telecom and enterprise networks. The flat surfaces gather dust, so clean with a 2.5 mm one-click tool or a lint-free wipe in one straight motion.
- LC connectors: a compact form factor used in high-density data centers with a smaller 1.25 mm ferrule that needs precise cleaning and light pressure. One-click pens are ideal for quick, repeatable cleaning.
- ST connectors: a twist-and-lock design in legacy and some industrial systems. Debris on the spring-loaded tip causes poor alignment; use a dry wipe or pen cleaner before each reconnection.
- FC connectors: a threaded, screw-on design used where vibration resistance matters. Dirt trapped in the ferrule threads degrades performance, so clean the end face and keep the threads clear.
- MPO/MTP connectors: multi-fiber arrays that require a dedicated cleaner sized to sweep every fiber in the row evenly.
Understanding What You Are Removing
Knowing the type of contamination helps you pick the right cleaning approach. Dust and lint are ubiquitous and easily attracted by static electricity; they may sit harmlessly outside the core but can migrate into the critical zone when connectors are mated. Films formed by oils, solvent residues, or fingerprints may look transparent but change the refractive index of the interface, raising reflectance and sometimes appearing as a rainbow sheen or fog under a microscope. Dry methods lift dust and lint; oily films almost always require the wet-to-dry method to remove fully.
Fiber Cleaning Tools at a Glance
| Tool | Best For | How to Use It |
| One-click / push-type cleaner | Connectors in adapters and ports; quick dry cleaning | Insert straight, push until “click,” one pass |
| Cassette / reel cleaner | Exposed ferrules; stubborn debris; many connectors | Draw ferrule across fresh tape in one straight motion |
| Swab | Recessed interfaces and mating sleeves | Dampen lightly, clean once, discard |
| Lint-free wipe | Exposed ferrules; wet-to-dry cleaning | Wet-to-dry straight pull, fresh section each pass |
Mistakes That Ruin Even Good Tools
- Skipping inspection: you never confirm the connector needed cleaning or that cleaning worked.
- Reusing wipes or swabs: a used surface is already dirty and puts particles back on the ferrule.
- Twisting a one-click cleaner: insert and push straight; angling it can scratch the end face.
- Flooding with fluid: excess fluid wicks contamination into the connector body. Use a little and finish dry.
- Using canned air as the main method: it moves particles around and can expel propellant onto the end face.
- Using household or low-grade alcohol: it leaves a film. Use fiber-grade fluid or ≥99% IPA.
Why Correct Technique Pays Off
Using these tools properly takes only seconds per connector, but skipping or rushing the process is expensive. A contaminated end face raises insertion loss and back reflection, producing slow or intermittent links that are hard to trace. Mating a dirty connector to a clean one contaminates both surfaces at once, and hard particles trapped in the contact zone can carve permanent scratches and pits into the glass — damage no cleaning can reverse. Good tool technique, backed by inspection, is the cheapest insurance an optical network has.
Get the Right Fiber Cleaning Tools
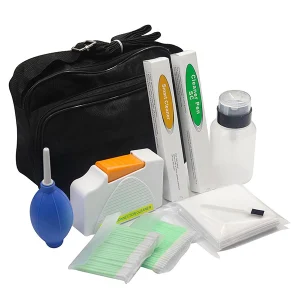
Reliable cleaning depends on purpose-built, optical-grade tools rather than improvised materials. Aevumix manufactures a complete line of fiber optic cleaning products — one-click cleaners, cassette cleaners, cleaning pens, swabs, lint-free wipes, and fiber-grade solvents — for every connector type. If you would like help assembling a cleaning kit for your network or workflow, contact our team and we will match the right tools to your needs.
FAQs
Do I Need to Inspect Before Using a Cleaning Tool?
Yes. The inspect–clean–inspect method is the reliable approach. Inspecting first tells you whether cleaning is even needed, and inspecting afterward confirms the end face is clean before you mate it. Cleaning a connector that is already clean can actually add static and dust.
How Many Times Can I Use a One-Click Cleaner?
Push-type cleaners are rated for a set number of cleanings — commonly several hundred per unit. Each push advances fresh cleaning material, so you are not reusing a dirty surface. Replace the tool once it reaches its rated life.
Can I Put Isopropyl Alcohol on a Cassette Cleaner?
Only if it is a fiber-approved cleaning fluid. Ordinary isopropyl alcohol can leave contaminants behind and may damage the end face. Use the wet-to-dry method with an approved fiber-grade solvent, and always finish on a dry section of tape.
Which Cleaning Tool Is Best for Connectors Inside a Port?
A one-click (push-type) cleaner is best for connectors seated in adapters, bulkheads, and transceiver ports because it reaches the recessed ferrule with controlled mechanical action. Match the tip size to the ferrule — 2.5 mm or 1.25 mm.
Is It Safe to Use Compressed Air to Clean Fiber?
Ordinary canned air is not recommended as a primary method because it can expel propellant or moisture and tends to relocate particles rather than remove them. A filtered, oil-free dry gas source can help clear loose dust from recessed areas only.