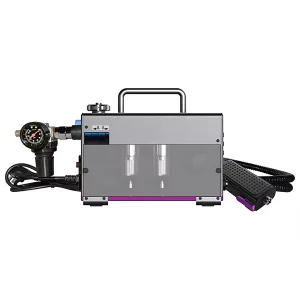
Fiber optic connectors are the small interface points where light passes from one fiber to another. Because the core of a single-mode fiber is only about 9 microns across, even a speck of dust that is invisible to the naked eye can block the light path, cause reflection, and degrade the entire link. This is why learning how to clean fiber optic connectors correctly is one of the most valuable skills a network technician can have.
In this guide, we will walk through the industry-standard cleaning workflow, the dry and wet methods, the tools you should keep in your kit, and the common mistakes that quietly ruin connectors. Everything here follows widely accepted best practices used by field installers and data-center teams.
Why Cleaning Fiber Optic Connectors Matters
A contaminated end face is the single most common cause of optical network problems. The most frequent contaminant is simply “debris” — dust, lint, ceramic particulate, or fingerprint oils that settle on the ferrule. When a dirty connector is mated to a clean one, both end faces become contaminated, and trapped particles in the contact zone can create permanent scratches and pits on the glass.
According to the international end-face standard IEC 61300-3-35, the connector end face is divided into zones — the core, the cladding, the adhesive region, and the outer contact area. Contamination in the core and cladding zones is the most damaging because that is exactly where the light travels. A single dust particle sitting on a 9-micron core can produce significant insertion loss and back reflection.
Bottom line: cleaning is not a cosmetic step. It is one of the cheapest forms of insurance in an optical network, and it should happen every time a connector is handled or mated.
The Golden Rule: Inspect, Clean, Inspect
The reliable, standards-aligned way to clean fiber optic connectors is the inspect–clean–inspect method. You never clean blindly. First you inspect the end face with a fiber microscope or digital probe; you clean only if contamination is found; then you re-inspect before mating.
This sequence mirrors the workflow described in IEC 61300-3-35, which sets out how to examine a ferrule for scratches, pits, and debris across defined zones and then decide whether it is fit to mate. The whole inspection process with a digital scope takes only a few seconds per connector.
Why not just clean everything to be safe? Because cleaning is not risk-free. Cleaning a connector that is already clean can generate a static charge that attracts new dust, deposit lint, or push particles into the contact zone. Inspecting first tells you whether cleaning is actually needed.
How to Clean Fiber Optic Connectors: Step by Step
Below is the practical field workflow. It applies whether you are working with SC, LC, FC, or MPO/MTP connectors — only the tool tips change with the connector type.
Step 1: Inspect the End Face First
Remove the protective dust cap and inspect the ferrule end face with a fiber inspection scope or digital probe. Look at the core and cladding zones for particles, streaks, or oil films. If the end face is clean and passes the acceptance criteria, you can mate it immediately — no cleaning required.
Step 2: Start With Dry Cleaning
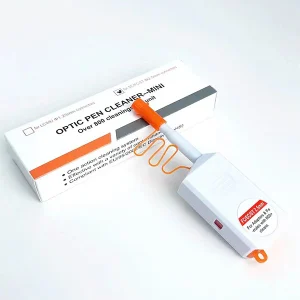
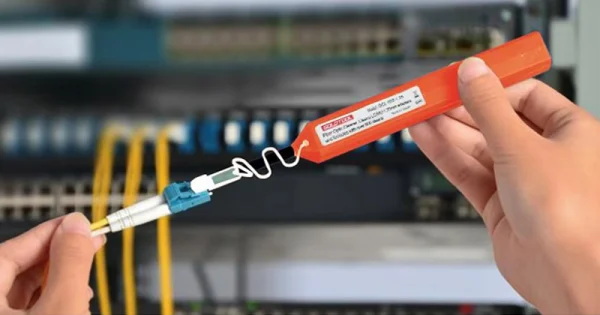
Dry cleaning is the first and most common step for removing light contamination such as dust and lint. Use a one-click (push-type) cleaner for connectors seated in adapters and bulkhead ports, a cassette/reel cleaner for cleaning many connectors in sequence, or a lint-free optical wipe for exposed patch-cord ferrules. Always use a fresh section of wipe for every pass and never reuse a swab.
Step 3: Use Wet-to-Dry Cleaning for Stubborn Contamination
If dry cleaning does not fully remove the contamination — typically oils, fingerprints, or dried residue — move to the wet-to-dry method. Apply a small drop of fiber-grade cleaning fluid (or high-purity, ≥99% isopropyl alcohol) onto a lint-free wipe, then draw the ferrule in one straight motion from the wet area across to the dry area of the wipe. Pull straight; do not scrub in circles, which redeposits debris.
Step 4: Finish Dry and Manage Static
A purely dry wipe leaves a static charge on the end face that immediately attracts new particulate. Finishing on a dry zone after a small amount of static-dissipative fluid solves this. Apply fluid to the wipe or swab — never flood the connector or drip fluid into an adapter, because excess fluid wicks dissolved contamination into the connector body.
Step 5: Re-Inspect Before Mating
Inspect the end face again. A clean connector shows a clear, defect-free core and cladding under the scope. If contamination or residue remains, repeat the process. Only mate the connector once it passes inspection, then immediately connect it or replace the dust cap.
Dry vs Wet vs Wet-to-Dry Cleaning
Each cleaning method has a place. The table below summarizes when to reach for which.
| Method | Best For | Key Tools | Watch Out For |
| Dry cleaning | Dust, lint, light airborne particles; routine pre-mate checks | One-click cleaner, cassette/reel cleaner, lint-free wipe | Static charge on the end face after wiping |
| Wet cleaning | Oils, fingerprints, dried residue | Fiber-grade fluid or ≥99% IPA, lint-free wipe/swab | Residue if fluid evaporates slowly; never leave it wet |
| Wet-to-dry (combination) | Stubborn or mixed contamination — the preferred all-round method | Small drop of fluid + lint-free wipe, finishing on dry area | Using too much fluid; must pull in one straight motion |
Cleaning Different Connector Types
The workflow stays the same, but match the tool to the connector and its access point:
- Exposed patch cords (SC, LC, FC): a lint-free wipe or wet-to-dry pass works well on the exposed ferrule.
- Connectors inside adapters or ports: use a one-click cleaner sized for the ferrule (2.5 mm for SC/FC, 1.25 mm for LC).
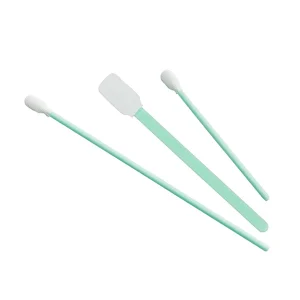
- Recessed or bulkhead interfaces: use a connector-specific swab with a small amount of fluid.
- MPO/MTP multi-fiber ferrules: use a dedicated MPO/MTP cleaner designed to clean all fibers in the array evenly.
Essential Fiber Cleaning Tools to Keep in Your Kit
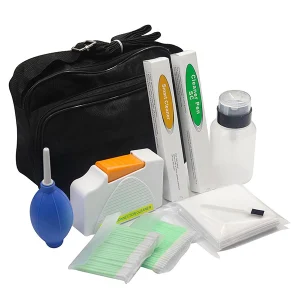
Consistent results come from having the right consumables ready before you start, so you are never tempted to improvise with the wrong material. A well-stocked cleaning kit should include the following:
- Fiber inspection scope or digital probe: the foundation of the inspect–clean–inspect method. Choose one with the correct adapter tips for your 1.25 mm and 2.5 mm ferrules.
- One-click (push-type) cleaners: compact tools for cleaning connectors seated in adapters and ports, available in LC (1.25 mm) and SC/FC (2.5 mm) sizes.
- Cassette or reel cleaners: a replaceable cleaning tape that lets you clean many exposed ferrules quickly and safely in sequence.
- Lint-free optical wipes: non-woven or low-lint wipes for dry and wet-to-dry cleaning; always advance to a fresh section for each pass.
- Connector swabs: sized for the port you are cleaning, ideal for recessed interfaces and mating sleeves.
- Fiber-grade cleaning fluid: a fast-drying, low-residue, static-dissipative solvent, or high-purity (≥99%) isopropyl alcohol.
- Clean dust caps and a waste container: protect cleaned connectors immediately, and dispose of used consumables so they never touch a clean end face.
Using purpose-built, optical-grade materials is not a luxury — makeshift or household items introduce lint, leave residue, or scratch the ferrule, which can turn a quick clean into a permanent defect.
Common Fiber Cleaning Mistakes to Avoid
Even experienced technicians slip into habits that damage connectors. Avoid these:
- Skipping inspection: cleaning without inspecting first means you never know if the connector was clean or if your cleaning worked.
- Reusing wipes or swabs: a used surface is already dirty and transfers particles right back onto the ferrule.
- Touching the end face: skin oil is difficult to remove and immediately degrades the signal.
- Relying on compressed “canned” air: it moves particles around rather than removing them, and many sprays expel propellant or moisture onto the end face.
- Using household alcohol or low-grade IPA: denatured or diluted alcohol leaves a film. Use ≥99% high-purity IPA or a fiber-grade solvent.
- Trusting dust caps to be clean: caps protect, they do not clean. A dirty cap contaminates a clean connector.
Find the Right Fiber Cleaning Tools
Clean results depend on using purpose-built, optical-grade consumables — not makeshift materials. At Aevumix, we manufacture a full range of fiber optic cleaning and inspection products, including one-click cleaners, cassette cleaners, lint-free wipes, swabs, fiber-grade solvents, and inspection scopes for every connector type. If you are not sure which cleaning kit fits your connectors or workflow, contact our team and we will help you match the right tools to your network.
FAQs
How Often Should You Clean Fiber Optic Connectors?
Follow the rule: if you handle it, inspect it, and clean it only if inspection shows contamination. In practice, that means inspecting before every mating and cleaning whenever debris, oil, or residue is found. Clean environments still need pre-connection checks because dust caps and adapters can carry contamination.
Can I Use Regular Rubbing Alcohol to Clean Fiber Connectors?
No. Standard rubbing alcohol is usually 70% and often denatured, which leaves a film on the end face. Use high-purity isopropyl alcohol (≥99%) or a dedicated fiber-grade cleaning fluid, and always finish on a dry area so no residue is left behind.
What Is the Best Way to Clean a Connector Inside a Port?
For connectors seated inside adapters, bulkheads, or transceiver ports, a one-click (push-type) cleaner is the most reliable tool because it reaches the recessed ferrule with controlled mechanical action. Match the cleaner tip to the ferrule size — 2.5 mm or 1.25 mm.
Why Do I Still Get Loss After Cleaning?
If loss persists after cleaning, the end face may have a permanent defect such as a scratch or pit rather than removable debris, or you may be re-contaminating it with a dirty cap or a used wipe. Inspect the core zone under a scope; if a defect is physical and inside the critical zone, the connector or cable may need to be replaced.
Is Compressed Air Safe for Cleaning Fiber?
Ordinary canned air is not recommended because it can expel propellant or moisture that contaminates the end face, and it tends to relocate particles rather than remove them. A filtered, oil-free dry gas source can help clear loose dust from recessed areas, but it should not be your primary cleaning method.